Character Research


3-View Character Model Sheet
3d Character Production Research

Paukov, V. (2020). Creating a real-time photorealistic portrait in ZBrush. [online] 3dtotal Publishing.
Available at: https://3dtotal.com/tutorials/t/creating-a-real-time-photorealistic-portrait-in-zbrush#article-blocking-in-zbrush
[Accessed 25 Mar. 2021].
Available at: https://3dtotal.com/tutorials/t/creating-a-real-time-photorealistic-portrait-in-zbrush#article-blocking-in-zbrush
[Accessed 25 Mar. 2021].
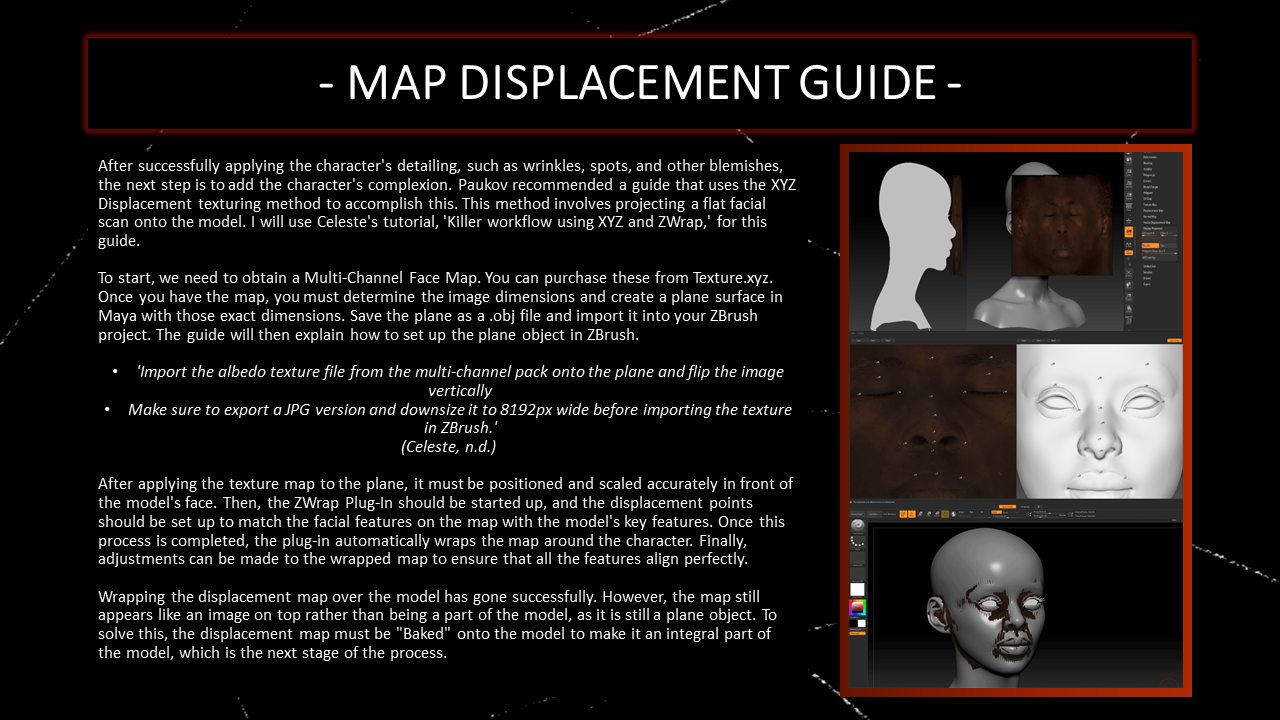
Celeste, J. (n.d.). Killer workflow using XYZ and Zwrap. [online] Texturing.xyz.
Available at: https://texturing.xyz/pages/killer-workflow-using-xyz-and-zwrap
[Accessed 31 Mar. 2021].
Available at: https://texturing.xyz/pages/killer-workflow-using-xyz-and-zwrap
[Accessed 31 Mar. 2021].
3D Character Turnaround
3D Character Evaluation
When I started working on this project, an idea came to me quickly. While this gave me a head start with my research and planning, it also made the brainstorming process feel redundant. This was an issue, particularly when analysing the evidence of an individual's thought processes and how they came up with their final idea. However, I made up for this by conducting thorough research and analysis into the foundation of my idea and the film franchise on which my concept was based.
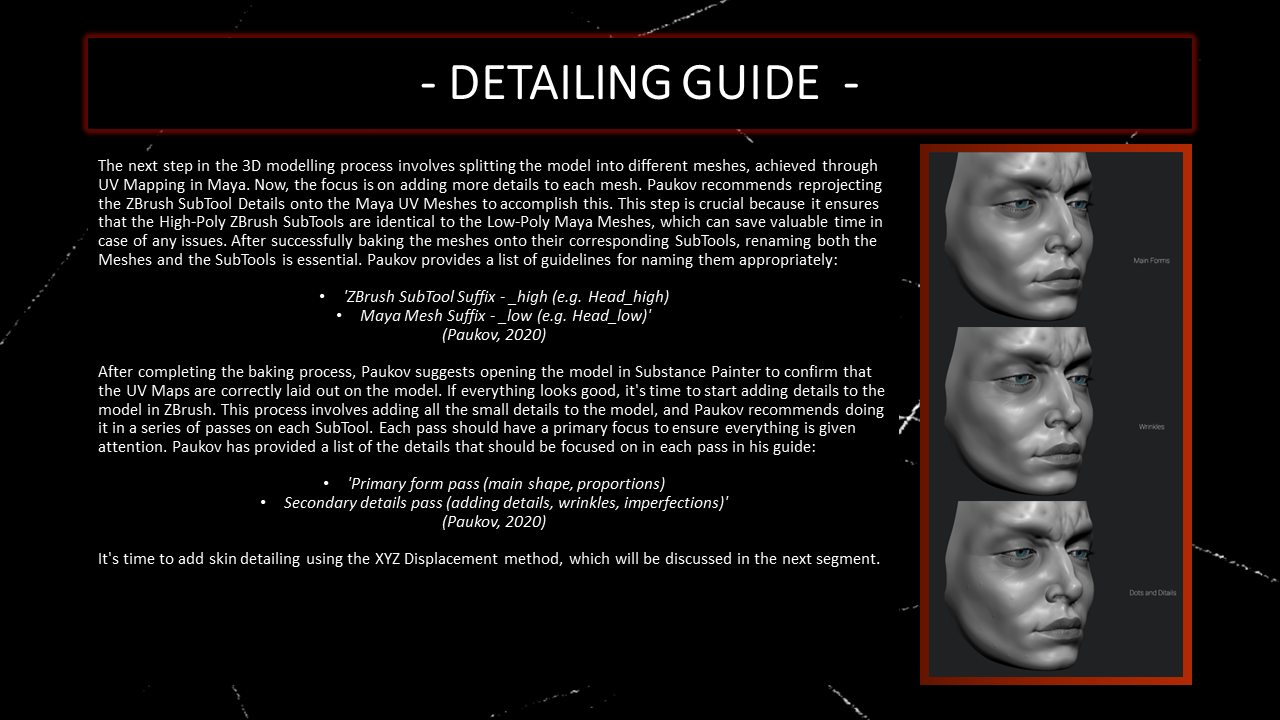
During my first experience with ZBrush, I felt anxious when I started the sculpting process. However, I overcame these nerves by relying on my research beforehand. I had prepared a few PowerPoint slides that helped me go through the different parts of the sculpting process. Thanks to these slides, I quickly familiarised myself with the ZBrush interface. At first, the ZBrush interface appeared overwhelming, but after a few days of using the software and learning its features, I became more comfortable with it. Initially, I didn't know the tools or what they did, but now I can efficiently navigate the interface to produce models.
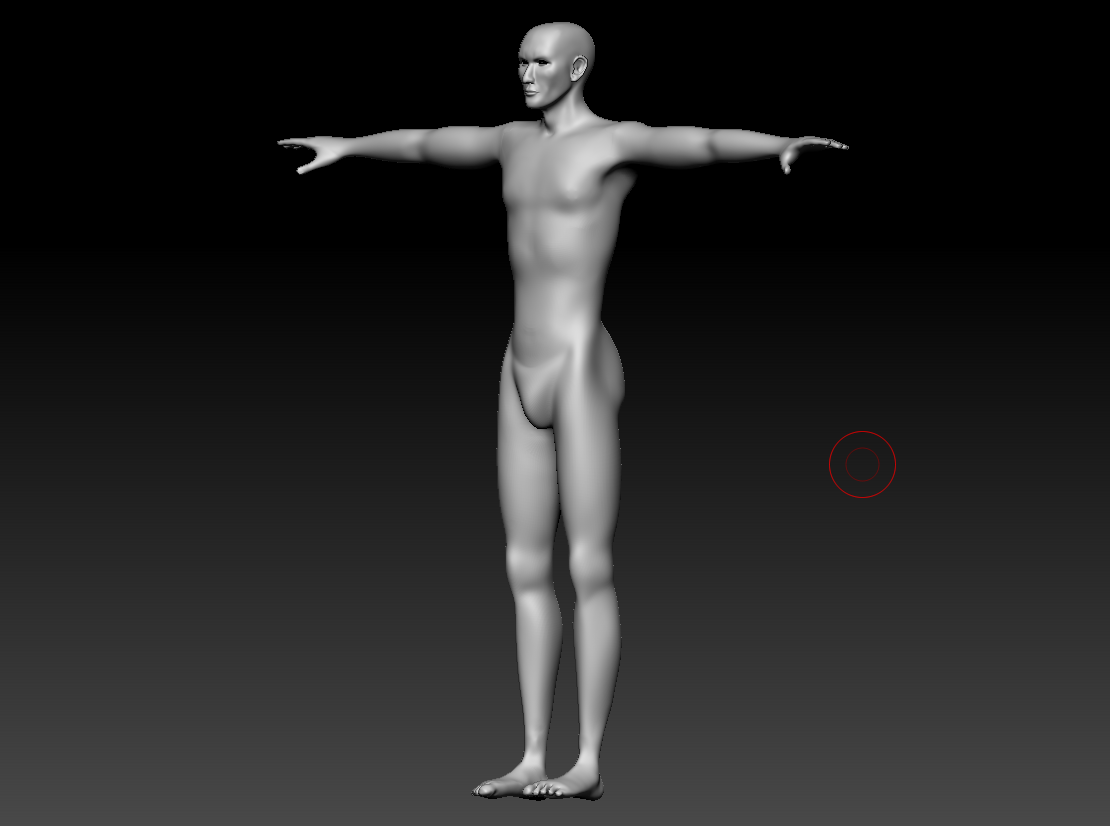
When creating the character, I initially considered using Zbrush's pre-set figure subtools as a base. However, I dismissed the idea as these pre-sets tend to look overly muscular and unnatural compared to an average human being. Instead, I used Autodesk's Character Creator software to create an essential human figure using simple blend shapes. Although the blend shape models lacked accuracy, they helped me create a more natural-looking figure closely resembling the actor I referenced. I then imported this model into Zbrush and continued refining the features based on my reference images.
Reflecting on the sculpting process, I am still delighted with my outcome. It was a great accomplishment to create such a model using software I had never used before, even though I still needed to apply textures to the model and create a scene for rendering.
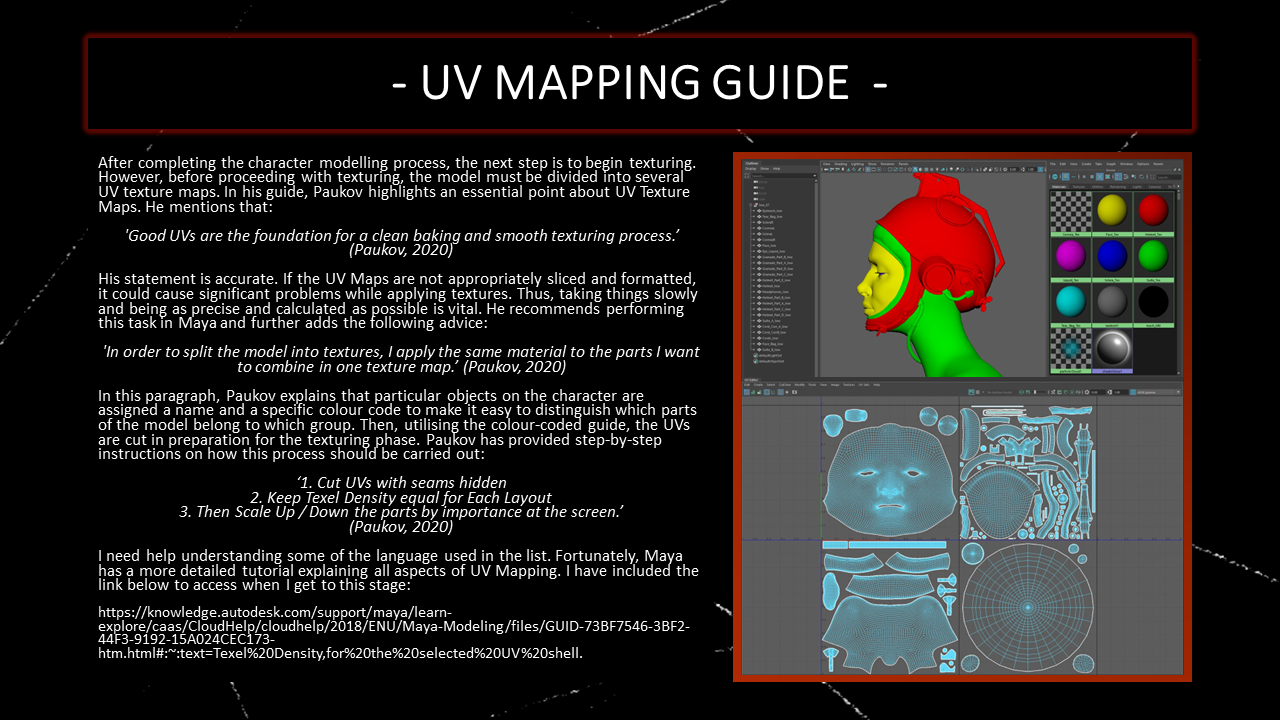
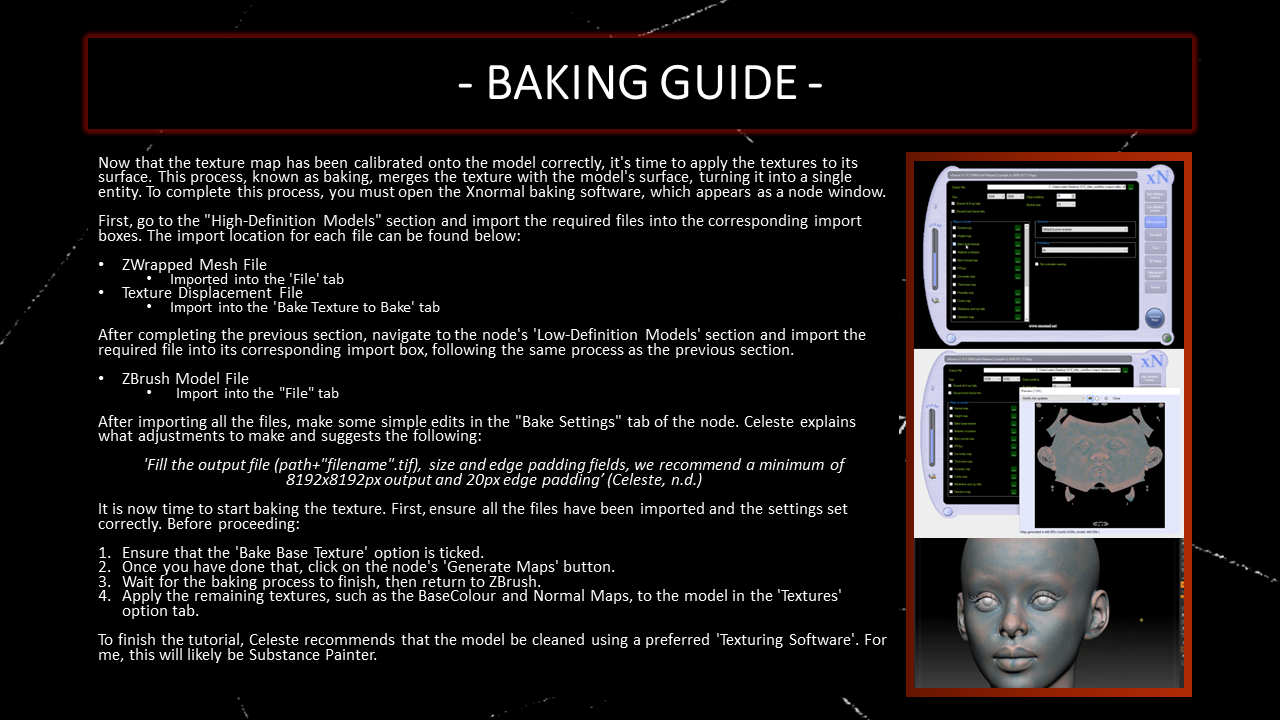
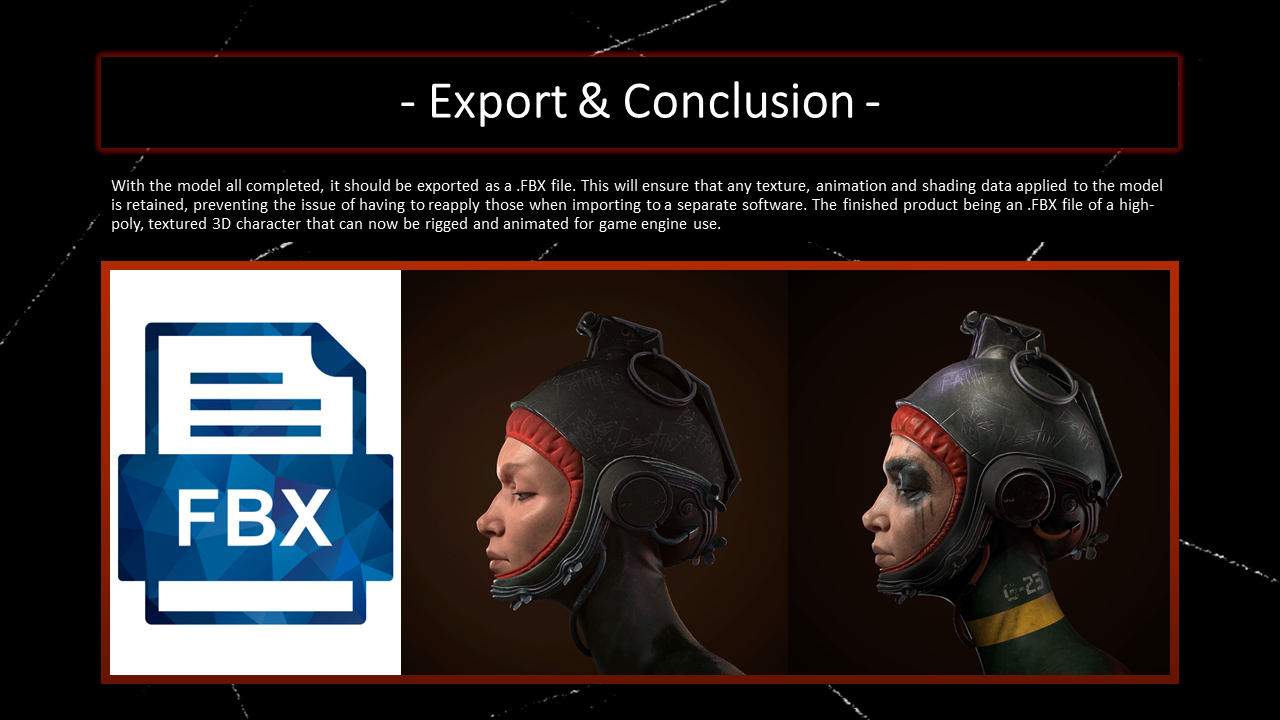
After creating my character in ZBrush, I exported it as a .obj file. The next step was to set the UV Map for the model so I could start texturing it for the renders. To do this, I used Autodesk Maya, which includes a very effective UV Mapping tool. Additionally, Maya comes with Arnold Renderer and Substance Plug-ins, which would be helpful for me. Lastly, I am very familiar with the software's tools and settings, which enable me to produce high-quality renders.
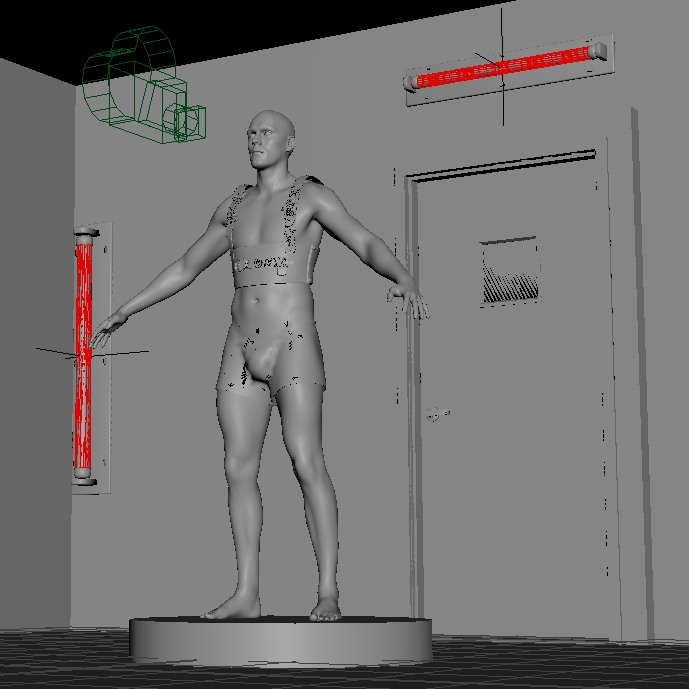
To create my final scene, I started by making a copy of the scene I had created for my Environment Art assignment. This saved me much time as I had already implemented lighting and camera settings. However, I had to make a few changes to the scene by removing all the props and decorative objects. I also removed any unnecessary lighting, adjusted the remaining lights' colour and intensity, and applied default materials to the objects in the room. As a result, I created a nice studio-like scene with intense lighting and a sleek backdrop that helped draw attention to the character model.
To showcase a character model, it's best to produce a turnaround reel, a short video that provides a 360-degree view of the character at various zoom levels such as far, mid, and head. To create this video, you need a "lazy-susan" or "turntable" object within the scene, which will hold the showcase object. You can then parent the showcase model to the turntable so that it moves and rotates when the turntable is moved or rotated. I added a cylinder object to the scene to create the turntable and scaled it into a thick, flat plate shape. Applying a metallic preset material texture to make it look more attractive. Lastly, I placed the turntable at the centre point of the scene where all the lights intersect; this is the perfect spot for showcasing a model as it provides balanced lighting.
I successfully created my scene, and it was time to import my character model. Initially, I wanted to include the trap device on the character model as I had in my concept art in the earlier assignment. However, it proved to be too obstructive. During the sculpting stage, due to the overall construction and typology of the trap device, it was nearly impossible to UV map the object effectively. Therefore, it could not be textured. Nevertheless, I kept the harness and boxer shorts for the character to include decorative clothing in the renders. Once imported, I positioned the character model on the turntable and made sure to parent them together, ending the scene setup stage of this project.