2.5D Parallax
Perspective Concept Art

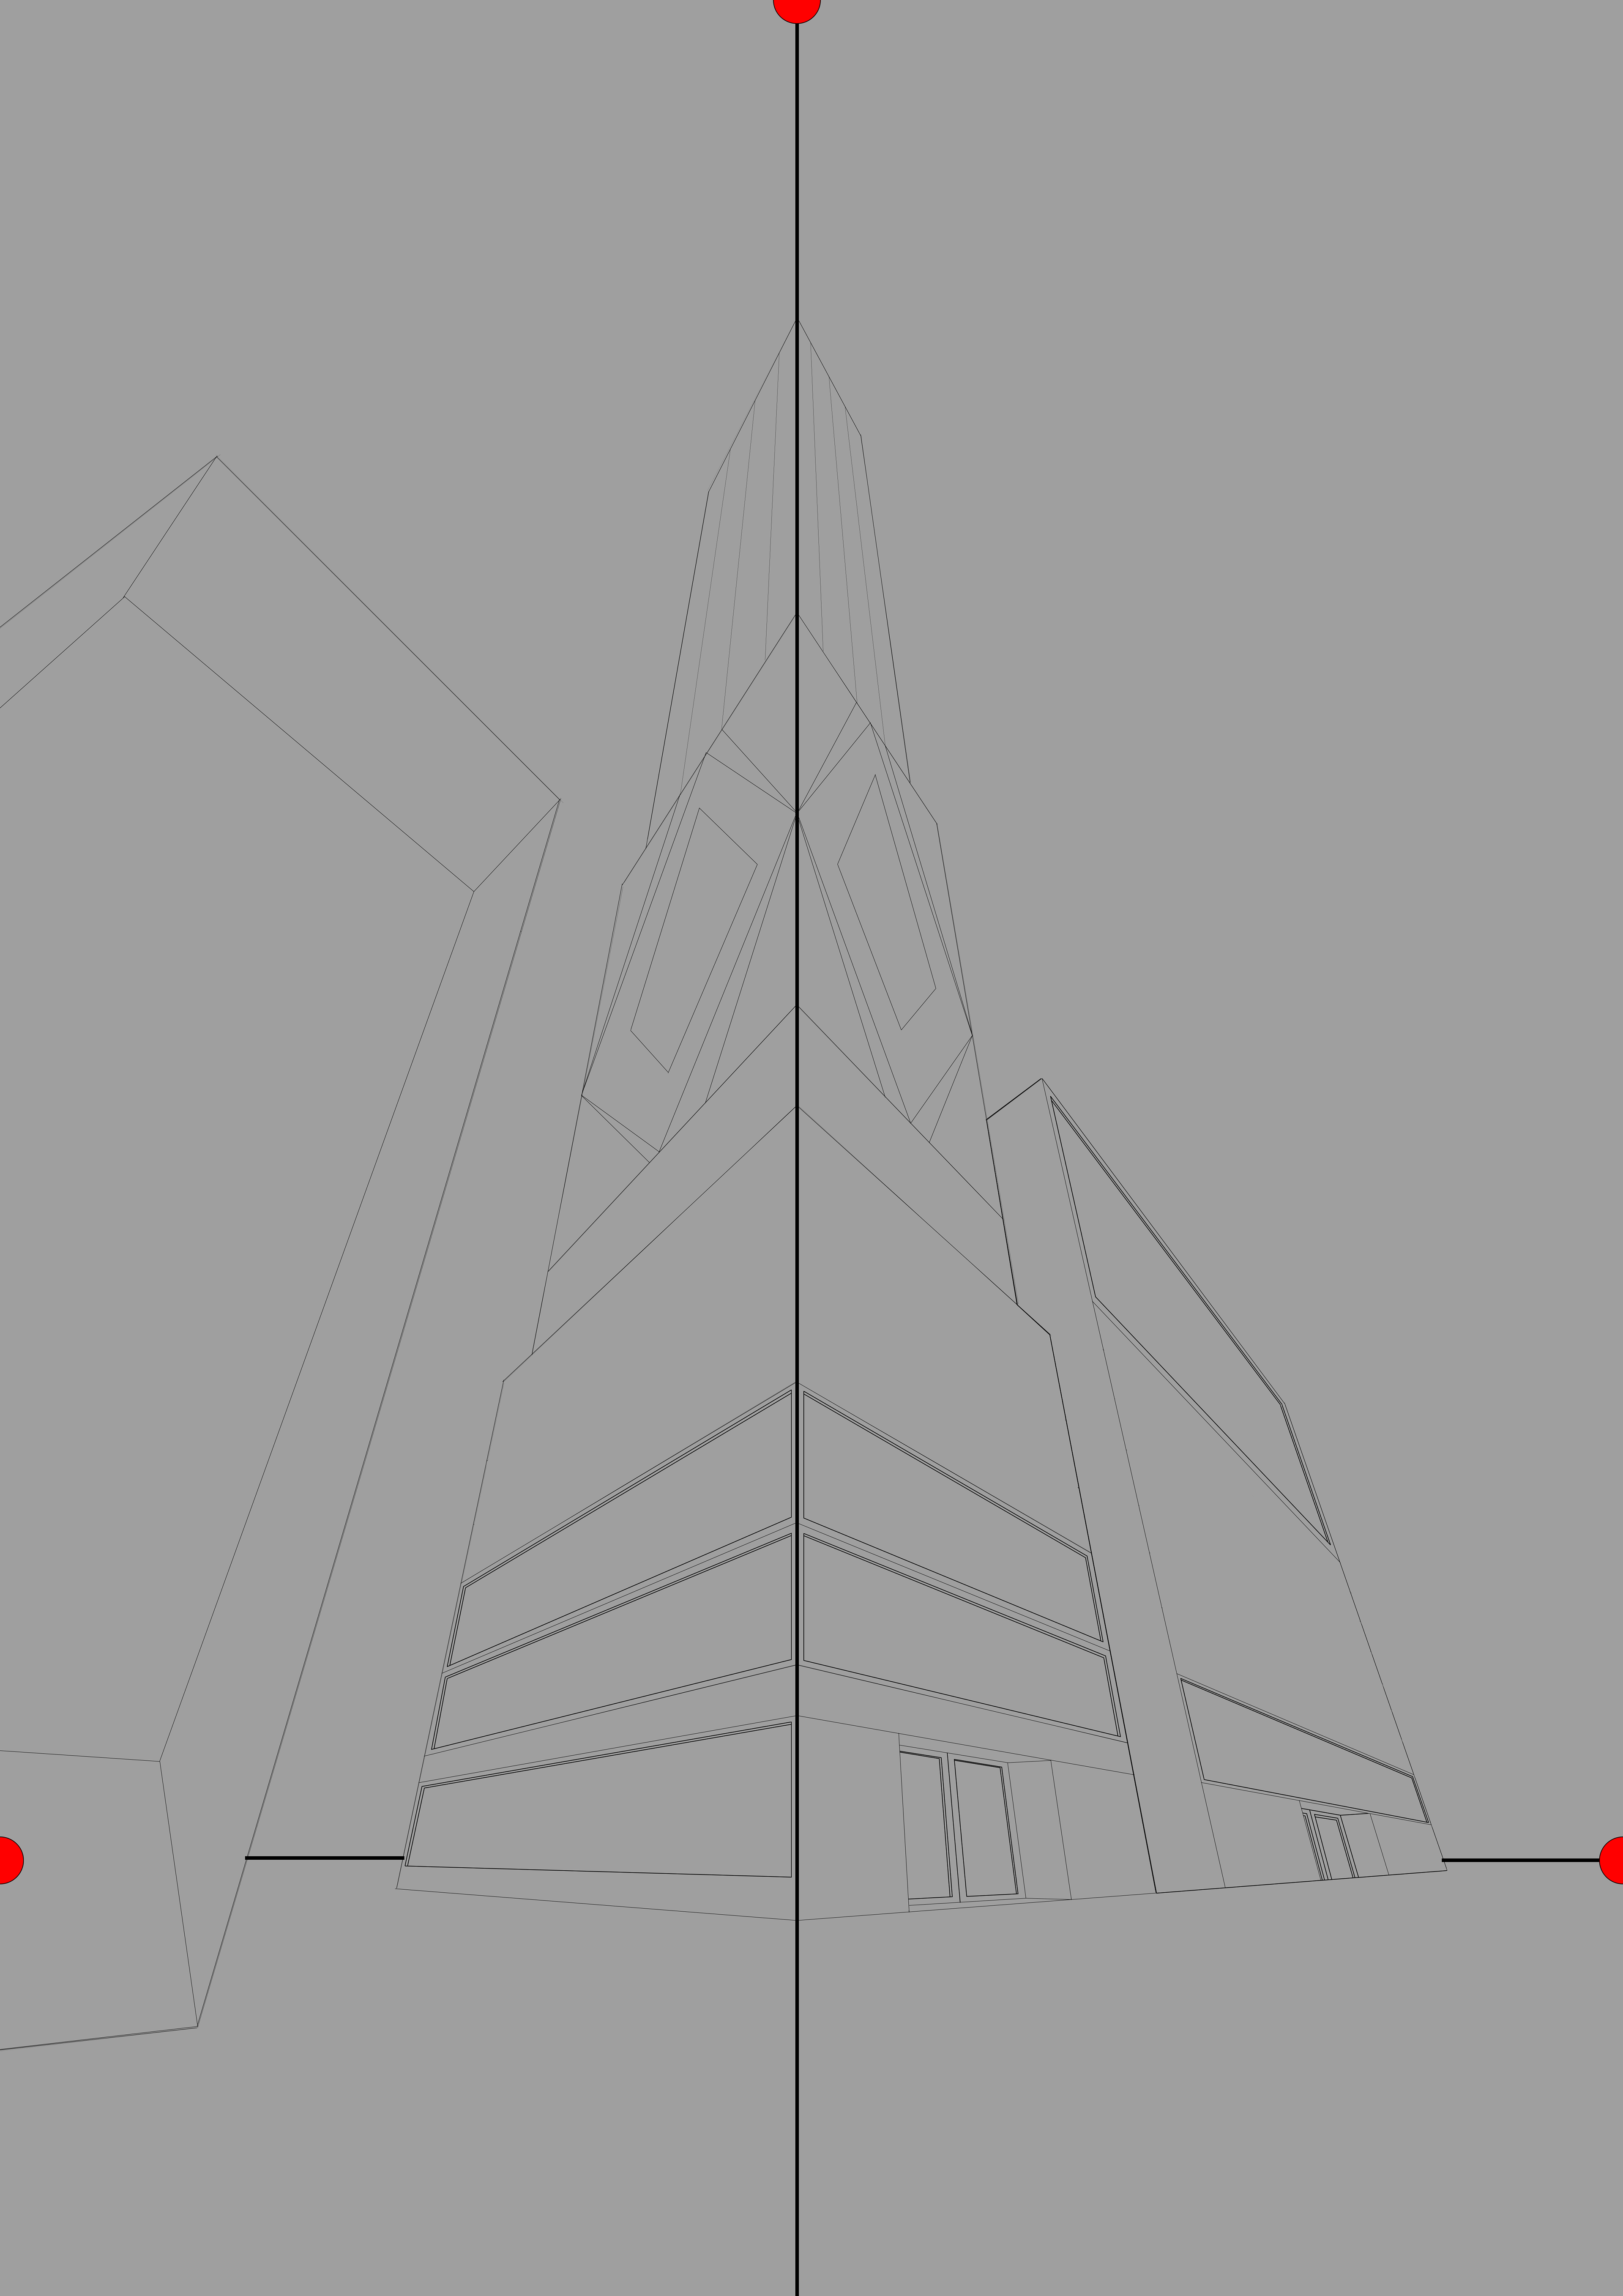
In art, Perspective Points, Golden Ratios, and Perspective Grids can help us create the illusion of depth and 3D objects in a 2D space. I've explored this technique in my artwork 'Neon Skies', which you can view above. When starting to use grids to create compositions, the easiest perspective to use is the 2-Point. However, I challenged myself to create a piece using the more difficult 3-Point perspective.
In the picture, you can observe that the depth is divided into three different directions. These areas are situated on both sides of the horizon line and at the upper center of the image. They are referred to as "Focal Points," which are unique points that serve as the objectives for all of the lines used to produce this image. If you take a ruler and draw a straight line from any edge within the image, you will notice that they all converge towards one of the three focal points. You can see a visual representation of this by referring to the line artwork provided.
By using this technique and investing a considerable amount of time in painting and editing the image, I managed to create a work of art that appears to have both a horizon and a towering skyscraper reaching for the sky. Additionally, this illusion has the effect of drawing the viewer's attention to the three focal points without them even realizing it, as all the objects in the image essentially point in those directions.
I'm thrilled with this piece as it showcases how perspective can create various illusions effectively. Plus, the use of colours and effects in the design produces a dreamy and cozy feel, which perfectly complements the illusory aspect.
2D Composition
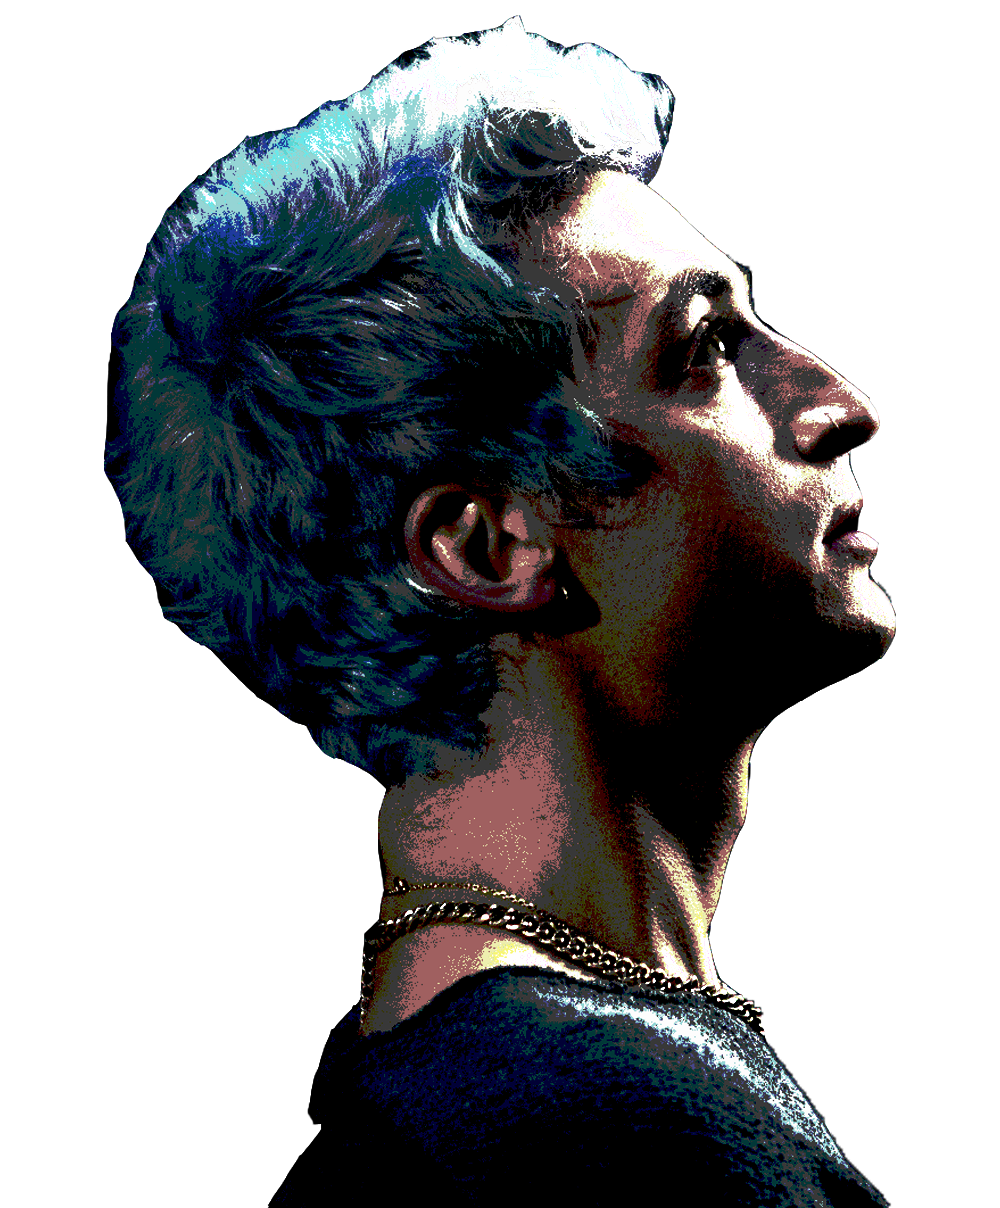
For this assignment, I was tasked with collecting high-quality portrait images and selecting one to stylise for my composition. I searched Google and gathered pictures of my favourite band's lead singers, such as Corey Taylor from Slipknot, Clem Richard from ASHEN, and Jonny Hawkins from Nothing More. I chose Clem Richard from ASHEN because of the way the photo uses lighting, backgrounds, and colours.
Next, I edited the image to enhance its colours and contrast. This helped to bring out the highlights and shadows, which became more distinct and defined. To accomplish this, I made four copies of the image and assigned different blending modes to each layer until I achieved my desired outcome.
I noticed that the clothing's edges were hard to see due to all the overlays, so I utilised the quick selection tool to choose the background and eliminate it. However, the edges appeared rough, so I employed the 'Select & Mask' Tool to identify and establish the image's boundaries. Lastly, I adjusted the feathering bars to enhance the edges around the cut-out.
Satisfied with my image, I saved it in a .PNG format and exported the document. Later, I launched Adobe Illustrator and imported the image to start creating my composition.
To begin, I focused on the facial area in the image. I utilized the pen and curvature tools to block out any dark shadow areas. Next, I moved on to the middle tones, choosing the desired colour with the eyedropper tool before blocking them out with the same tools as before. Finally, I blocked out the highlights before smoothing out the edges of all the sections to ensure there were no gaps.
Next, I tackled the hair, which proved challenging because of its intricate colours and shapes. Using the same methods as I did with the face, I carefully followed the contours of the hair until I reached the top. At first, the transition from the darker to lighter shades of blue was too abrupt, so I added a few extra blobs with a turquoise hue to balance the contrast. The result exceeded my expectations and turned out much better than I had imagined.
You may have noticed that I didn't cover the clothing or jewellery within the composition. This is because the intricate shapes and forms of those items would require a lot of time and effort to accurately recreate.
After completing my composition, I exported it and merged it with the original Photoshop document. I edited the image to ensure that my piece completely covered the original image. The contrast between the flat-coloured work I created alongside the jewellery and the background of the picture complemented each other perfectly. The combination of actual lighting and the composition made the piece blend seamlessly and gave the brighter highlights an extra boost. Overall, I am pleased with the final outcome.
You can see the original images and references I used for this piece below:


(Escapist, 2022) Original

(Escapist, 2022) Edit #1
(Escapist, 2022) Edit #2
Escapist, S. (2022). ASHEN Interview Clém Richard, Niels Tozer & Antoine Zimer. [online] HARD FORCE.
Available at: https://hardforce.com/actu/40235/ashen-interview
[Accessed 15 Nov. 2022]
Available at: https://hardforce.com/actu/40235/ashen-interview
[Accessed 15 Nov. 2022]
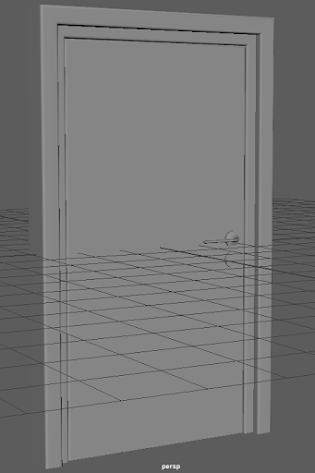
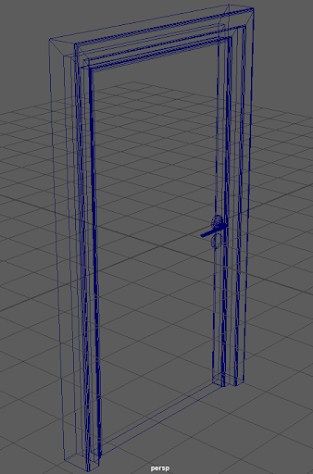
Door Asset Model
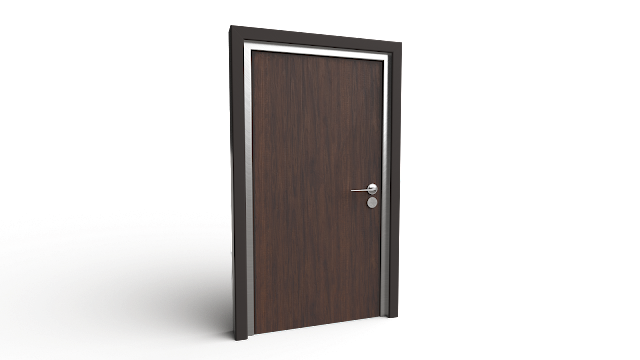
Door Texture Maps
Diffusion Map
Displacement Map
Normal Map
When making 3D models, texture maps are utilized to apply repetitive patterns, textures, or unique visual effects to the surfaces of the models. This results in the model having colour, depth, and detail, making it more identifiable and captivating for players than a dull grey object.
Diffusion Map -
As we all know, light affects the colour of most materials. Diffusion maps use colour, shadow, and ambient occlusion data to create a realistic texture that displays brighter or darker hues depending on the light intensity in different areas.
As we all know, light affects the colour of most materials. Diffusion maps use colour, shadow, and ambient occlusion data to create a realistic texture that displays brighter or darker hues depending on the light intensity in different areas.
Displacement Map -
Displacement Maps alter surface depth by using greyscale images with black and white gradients. Darker shades create a deeper surface, while brighter shades create a higher surface, producing a textured effect imitating bumps and grooves.
Displacement Maps alter surface depth by using greyscale images with black and white gradients. Darker shades create a deeper surface, while brighter shades create a higher surface, producing a textured effect imitating bumps and grooves.
Normal Map -
Much like Displacement Maps, Normal Maps are essential for adding subtle depth to textures. The map uses a purple base colour and R/G/B values linked to your object mesh's X/Y/Z coordinates. This data then simulates minor cracks, bumps, or pores on your model, enhancing its realism.
Much like Displacement Maps, Normal Maps are essential for adding subtle depth to textures. The map uses a purple base colour and R/G/B values linked to your object mesh's X/Y/Z coordinates. This data then simulates minor cracks, bumps, or pores on your model, enhancing its realism.
Combining these maps is what allowed me to produce the realistic door model.
2D Fan animation